
Install putty for Windows and work with ssh keys
A lot of webservers run a Linux operating system. They are often controlled by the textbased ssh protocol whereas Windows uses graphical user interfaces and protocols like remote desktop (RDP) or VNC. On Windows you can make changes to your website on a linux server using putty. It's available for download free of charge.
What are ssh keys?
Most webhosting companies support logins with username and password. This is the easiest solution if you have just one ssh account but with several websites the time needed to manage all access credentials increases. People tend to save those in a file, and a password manager, and of course in every software that needs them in the first place. Ssh keys can be used to simplify the situation and save time as they work like a master key. Just one ssh key pair is enough to manage all your websites.
Technically ssh keys consist of a public and a private key. As the names indicate, the private key has to be kept private (which means on your computer only) and it should be protected by a secure password. The public key will be distributed to all the servers you want to manage. It's called public because everyone can see it without security implications. This procedure is in use for decades and considered very secure. All connections are encrypted, not just the login process. That means that all commands or data transported over a ssh connection are never sent in cleartext.
Install putty
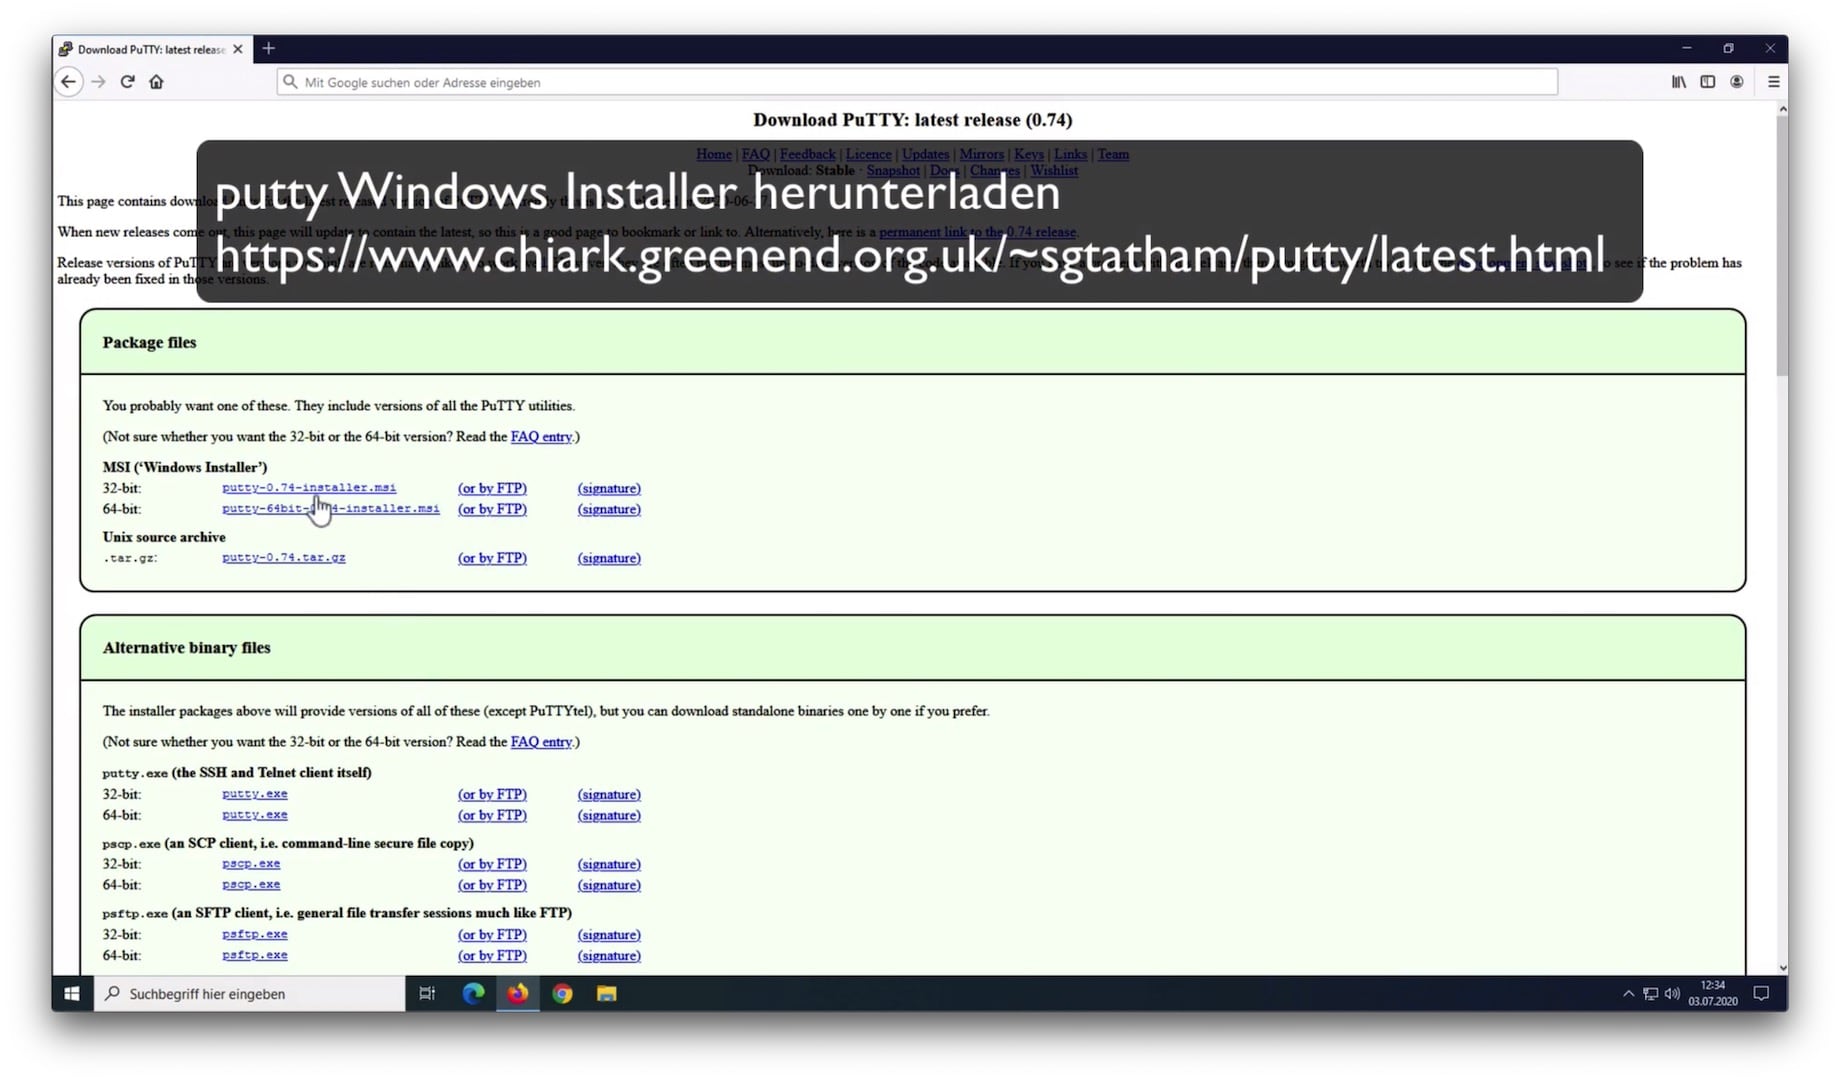
Putty can be downloaded from its authors site free of charge: https://www.chiark.greenend.org.uk/~sgtatham/putty/latest.html
Choose the installer for your Windows version: 32-bit for older Windows versions and computers that have 4 GB of RAM at most, the 64-bit version otherwise. It's best practice to verify all downloaded files with checksums (like SHA256) or signatures (GPG) in order to guarantee their integrity. How to verify that is out of the scope of this document and may be subject to a future article. Putty offers gpg-signatures (signature) as well as checksums (Checksum files) at the end of the page.
Open the .msi file you've just downloaded using the Windows Explorer and follow the installer's directions.
Generate ssh keys
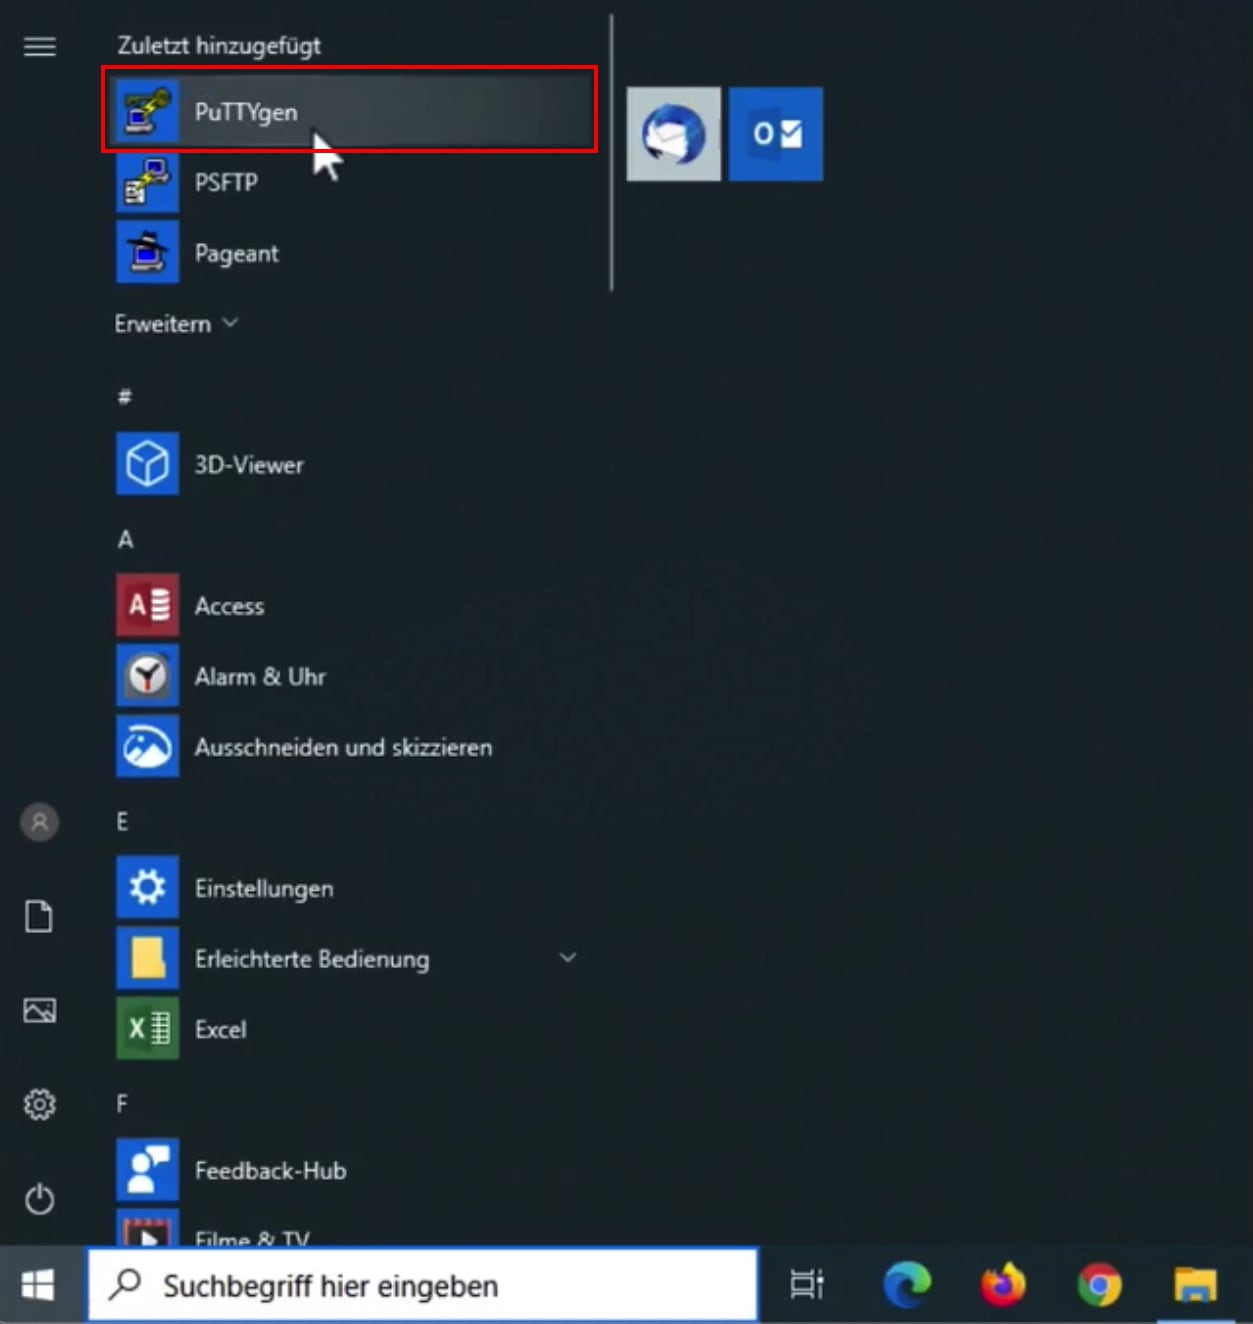
Start PUTTYgen to generate a new ssh key:
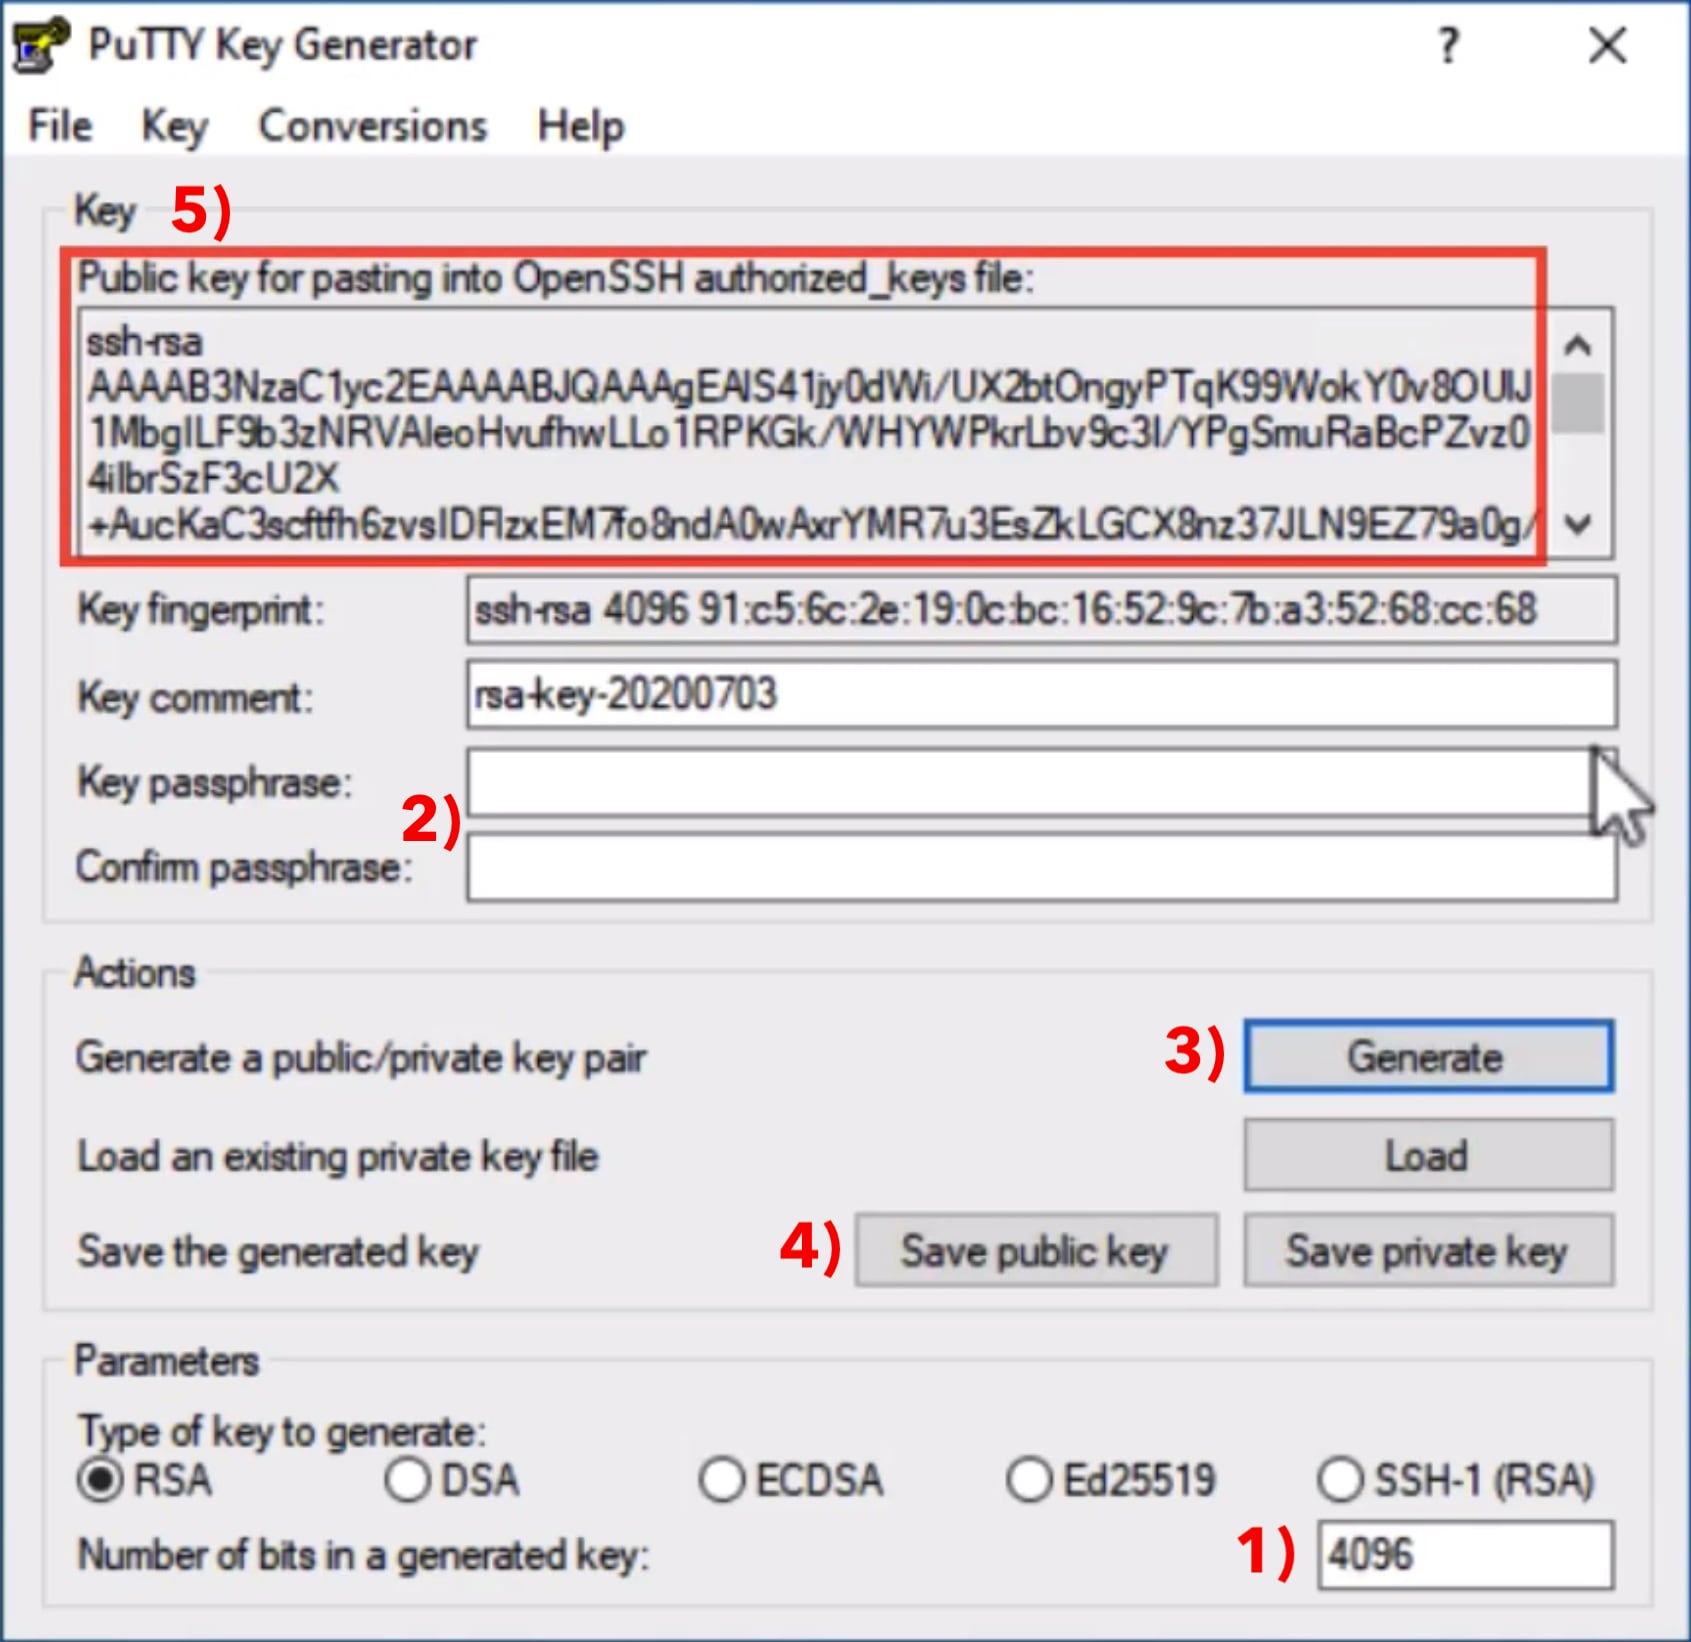
The settings are as follows:
- 1) Parameters
Create a new RSA key with 4096 Bit. This is more secure than 2048 Bit in case the key should be used for many years. - 2) New key password
Think of a new password and enter it there. You are reminded that this key will be used to manage all accounts, so choose a secure password please. - 3) Generate key
Click on Generate to create a new key pair. Move the mouse on your screen to create some additional ramdom data, that will be used to calculate your new key. - 4) Save key
Click on Save public key and save it in a file named id_rsa.pub. Click on Save private key afterwards and save that in a file named id_rsa.ppk - 5) Save OpenSSH key
Copy all the text that starts with ssh-rsa ... from the section "Public key for pasting into OpenSSH authoried_keys file" to the clipboard. This is your public key from step 4) just in OpenSSH format that is used by most Linux servers. Now copy the text from the clipboard into a file and save it. Afterwards send this file to your provider - maybe using a webinterface where you can upload it yourself or by email. There is no security risk sending it by email because it is your public key. After your provider copied the key into the ~/.ssh/authorized_keys file on the server, you can start your first ssh session.
Create a ssh connection with Putty
Your ssh key has been generated and registered with the server. Now it's time to setup the connection in Putty:

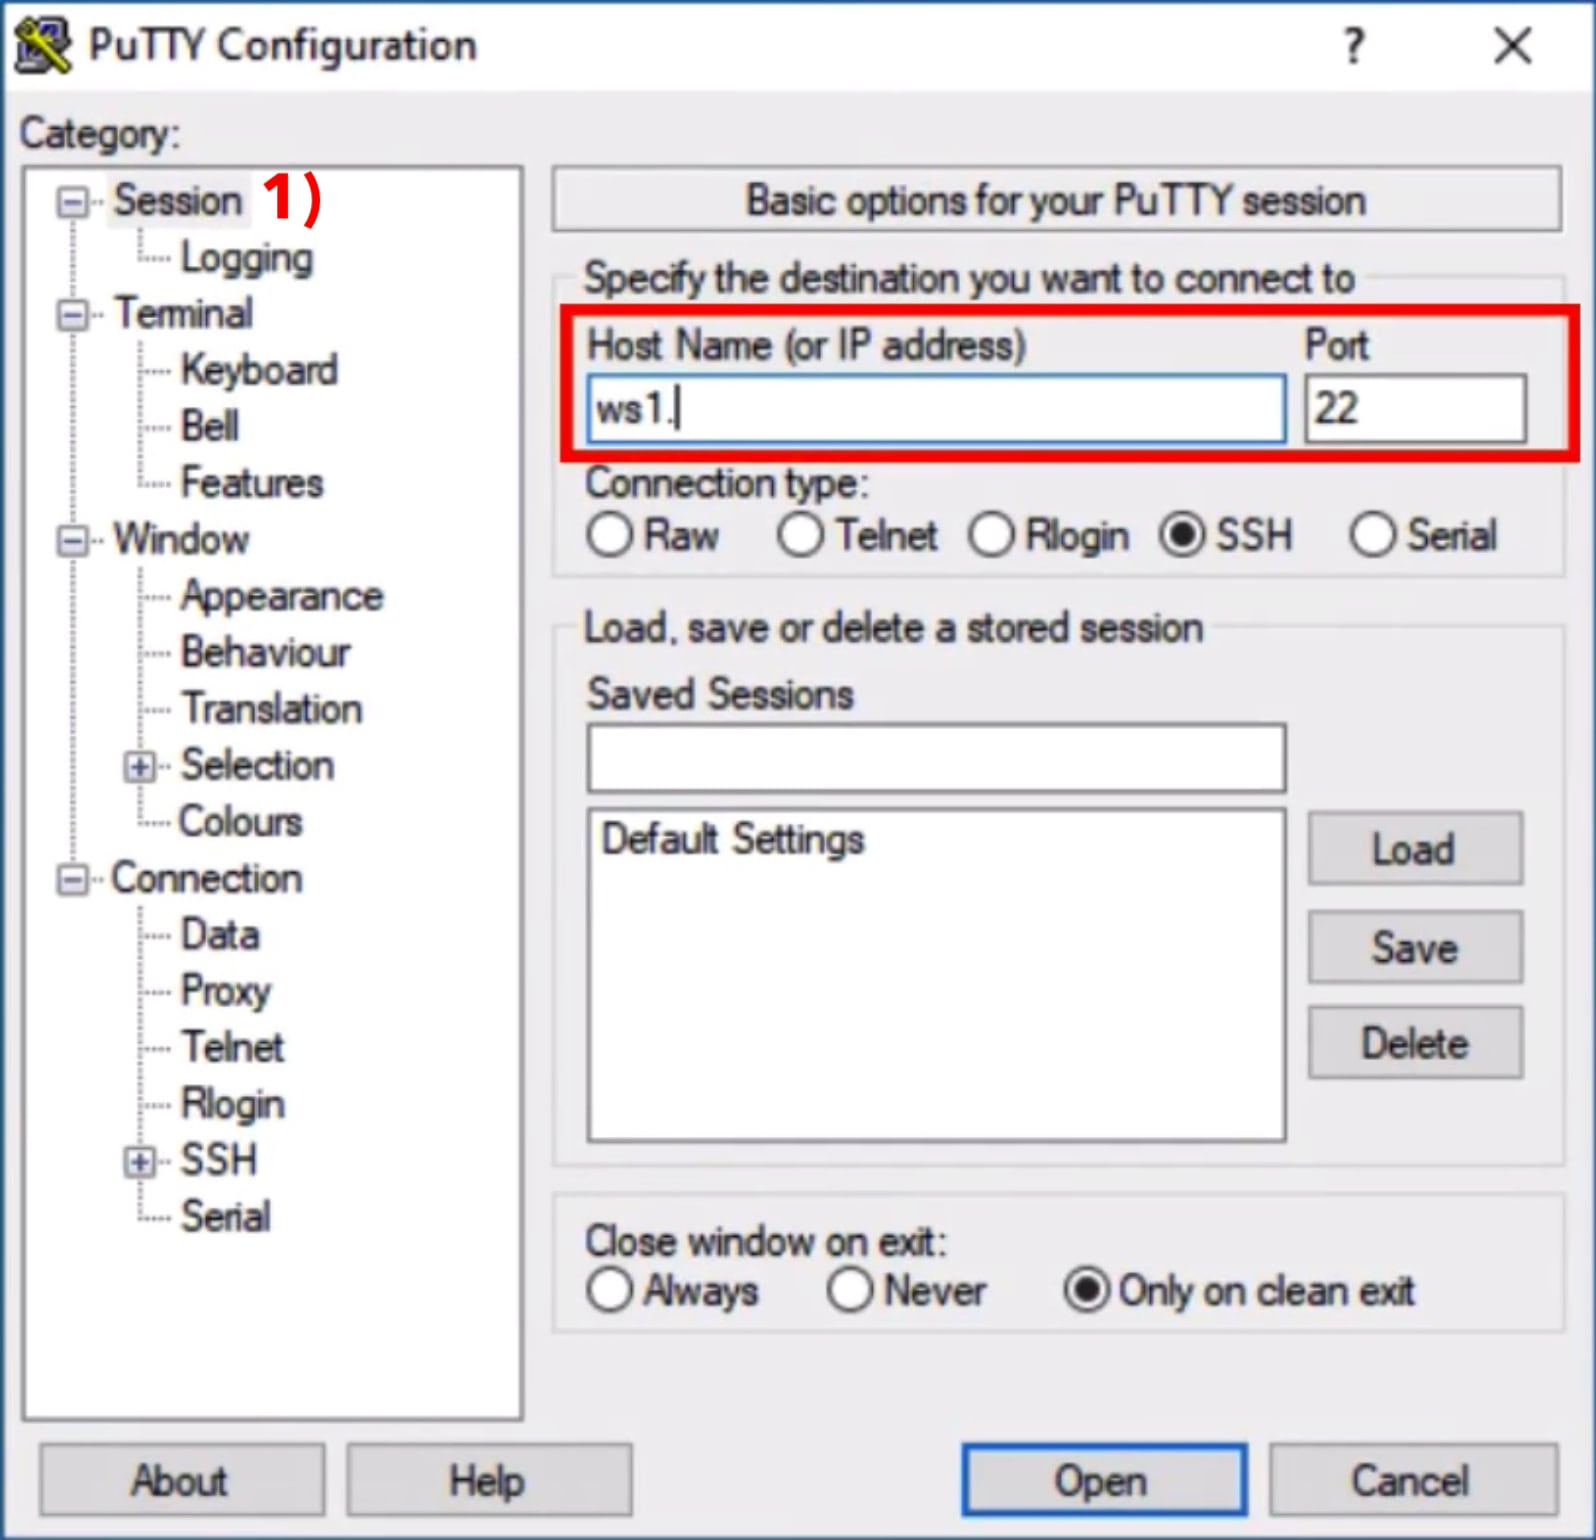
Click on the category Session 1) if not yet selected. Go to the area marked in red on the right side and enter the servername (also called hostname) or an ip address, that your provider sent. Verify that Connection type is set to SSH and the Port is set to 22 (some providers use a non standard port here).
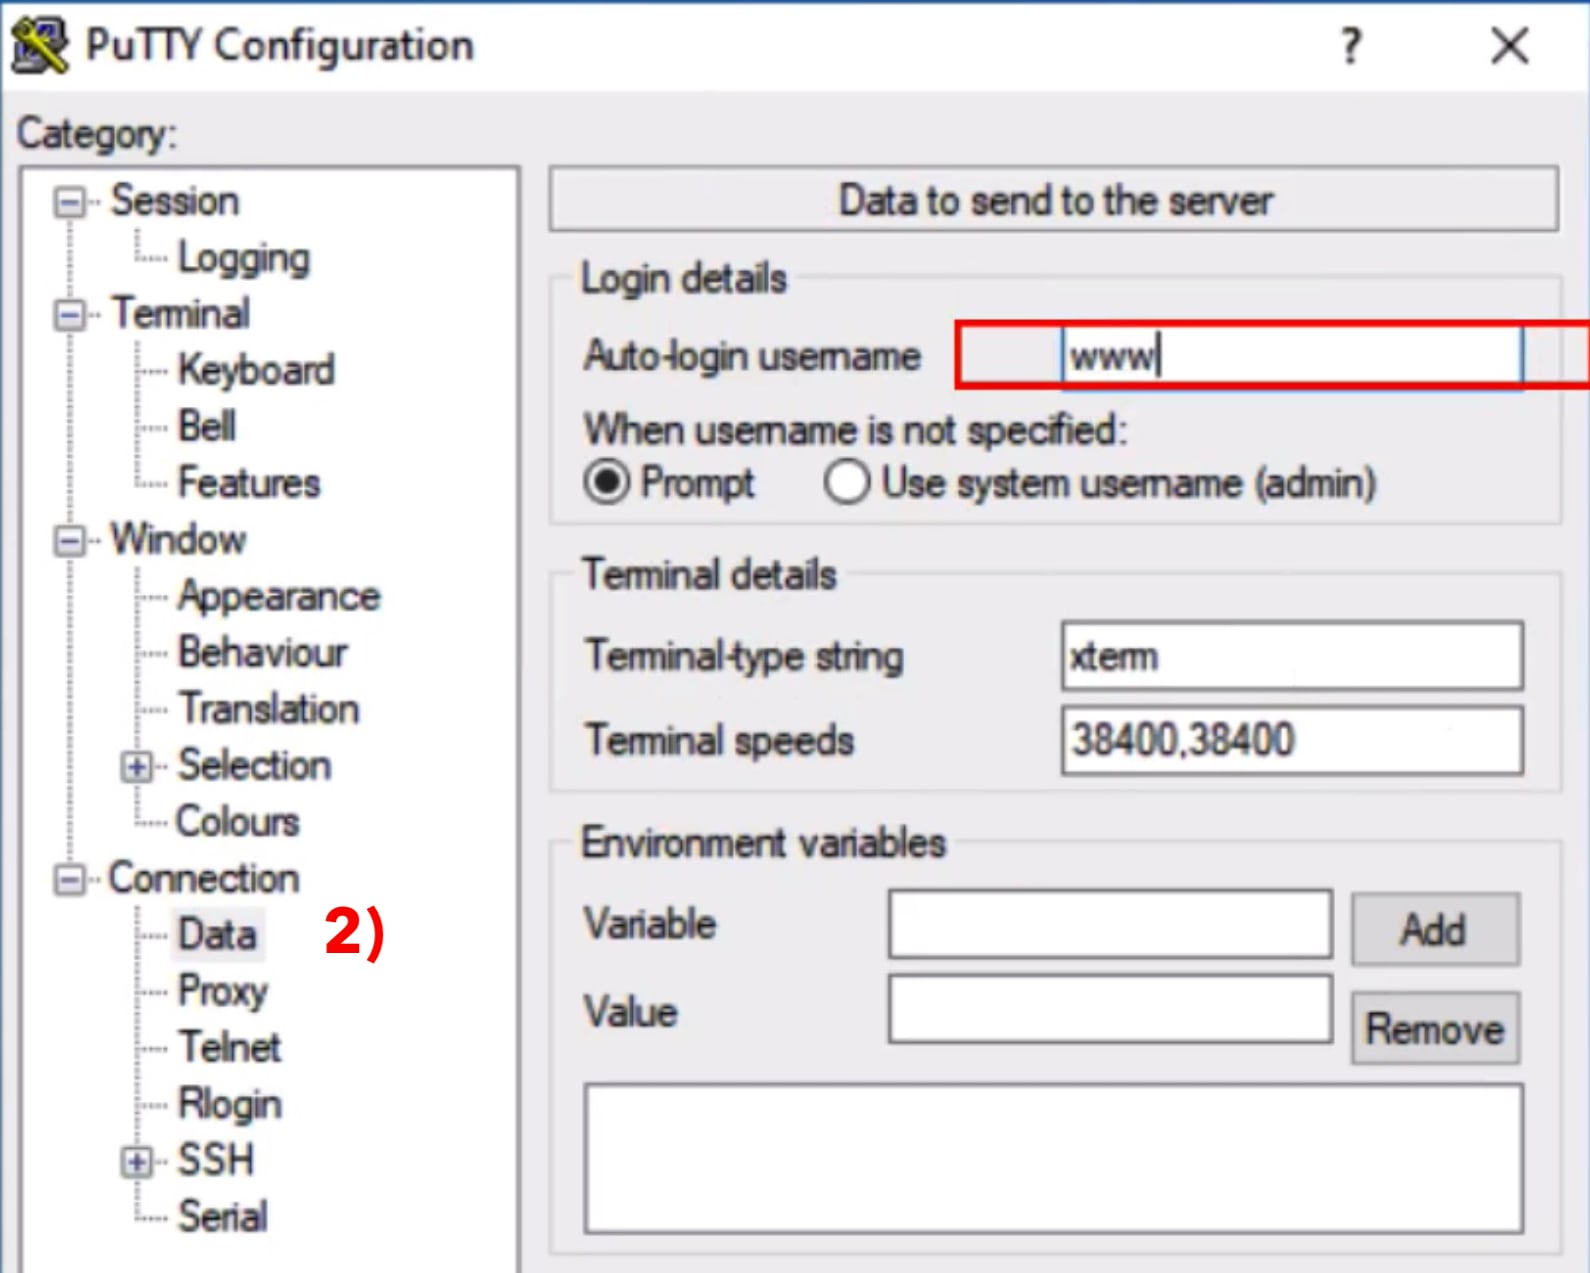
Next, go to Connection ⟩ Data 2) in the left section. Enter your username in the field Auto-login username on the upper right area marked in red. You may skip this step but then you would have to enter your username manually any time you start the connection.
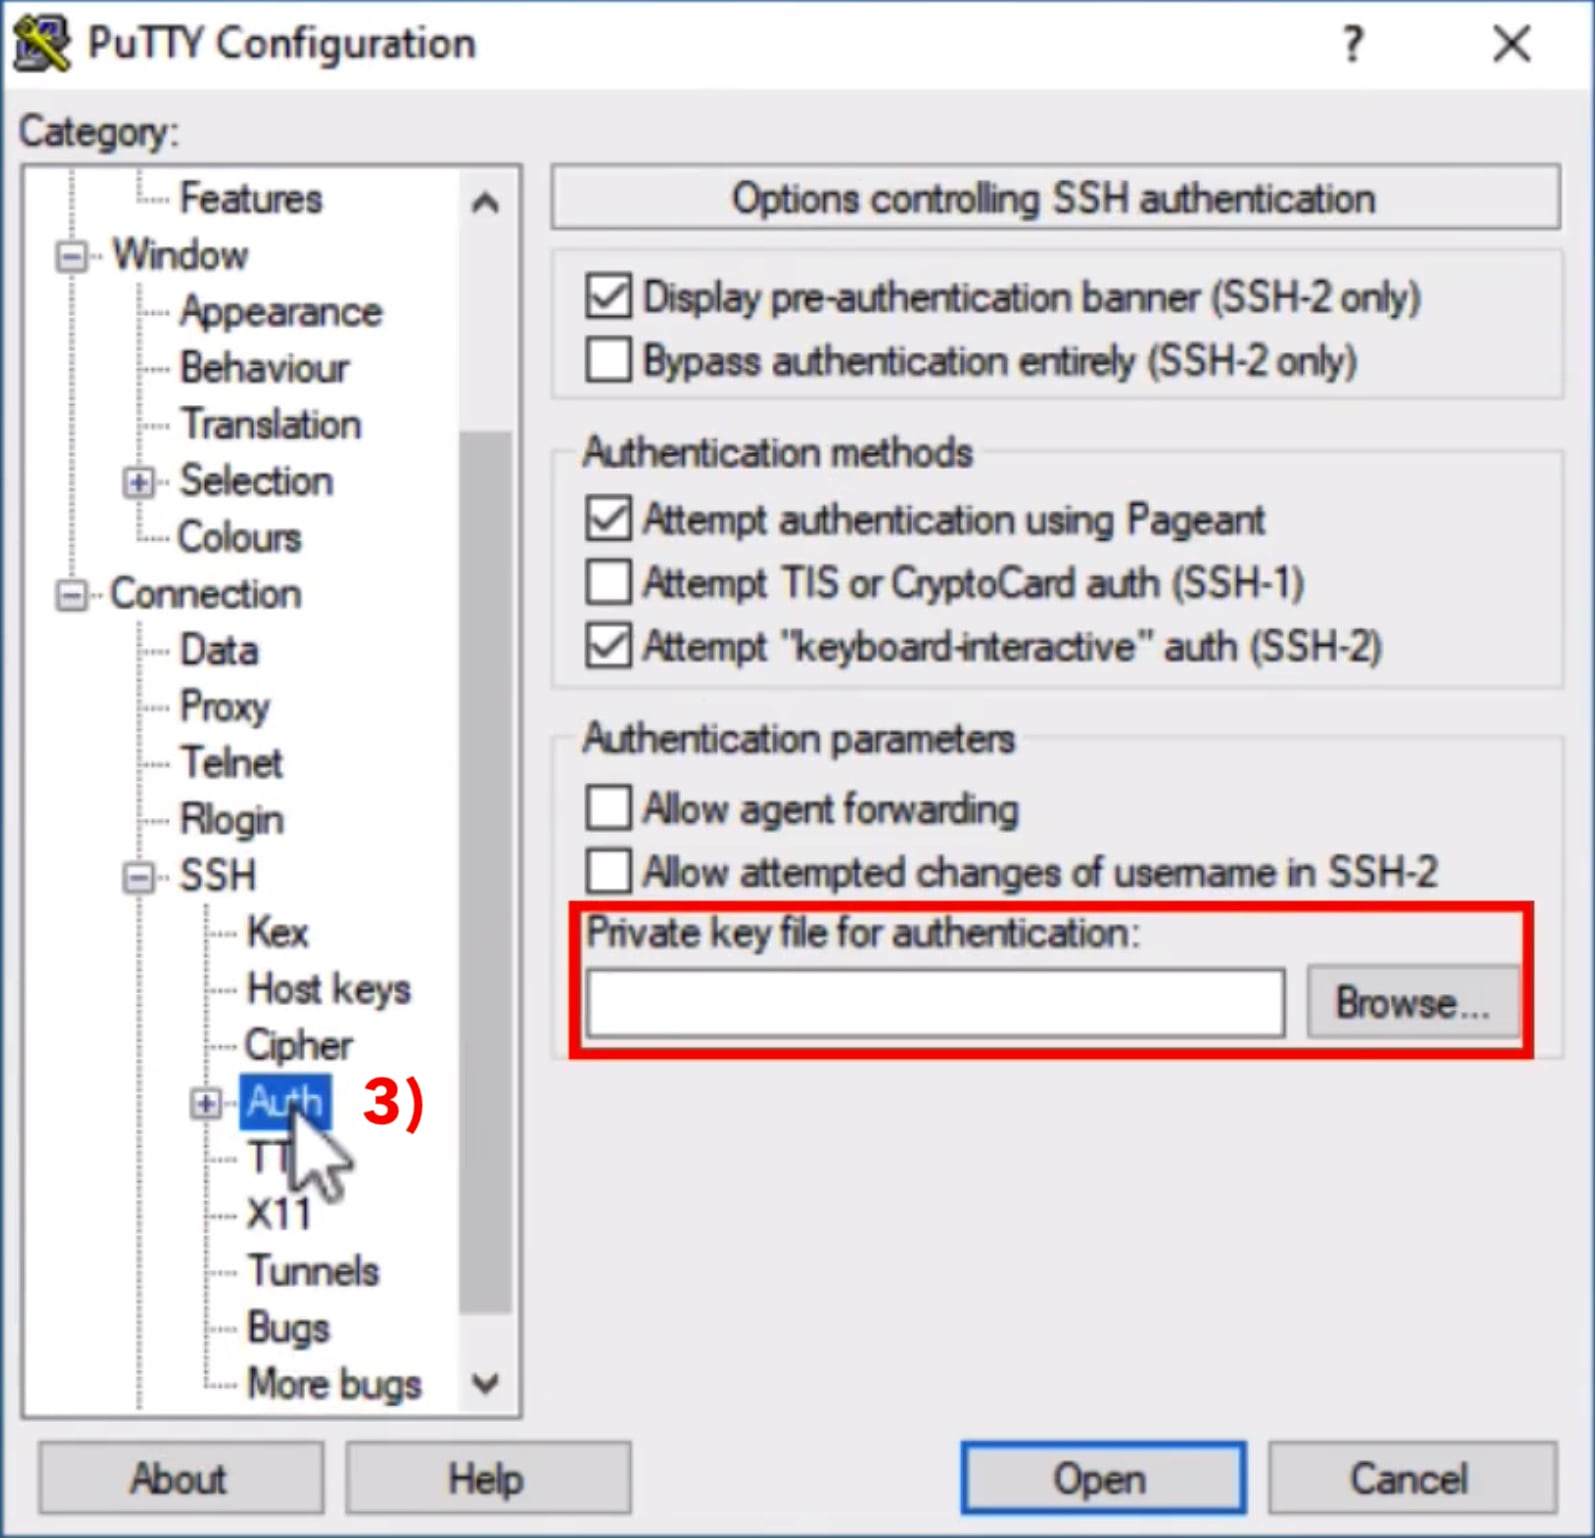
Next, go to Connection ⟩ SSH ⟩ Auth 3) in the left column. Now click on Browse in the Private key for authentication section marked in red on the right side. Locate the file containing your private key that you have generated a few minutes ago (id_rsa.ppk).
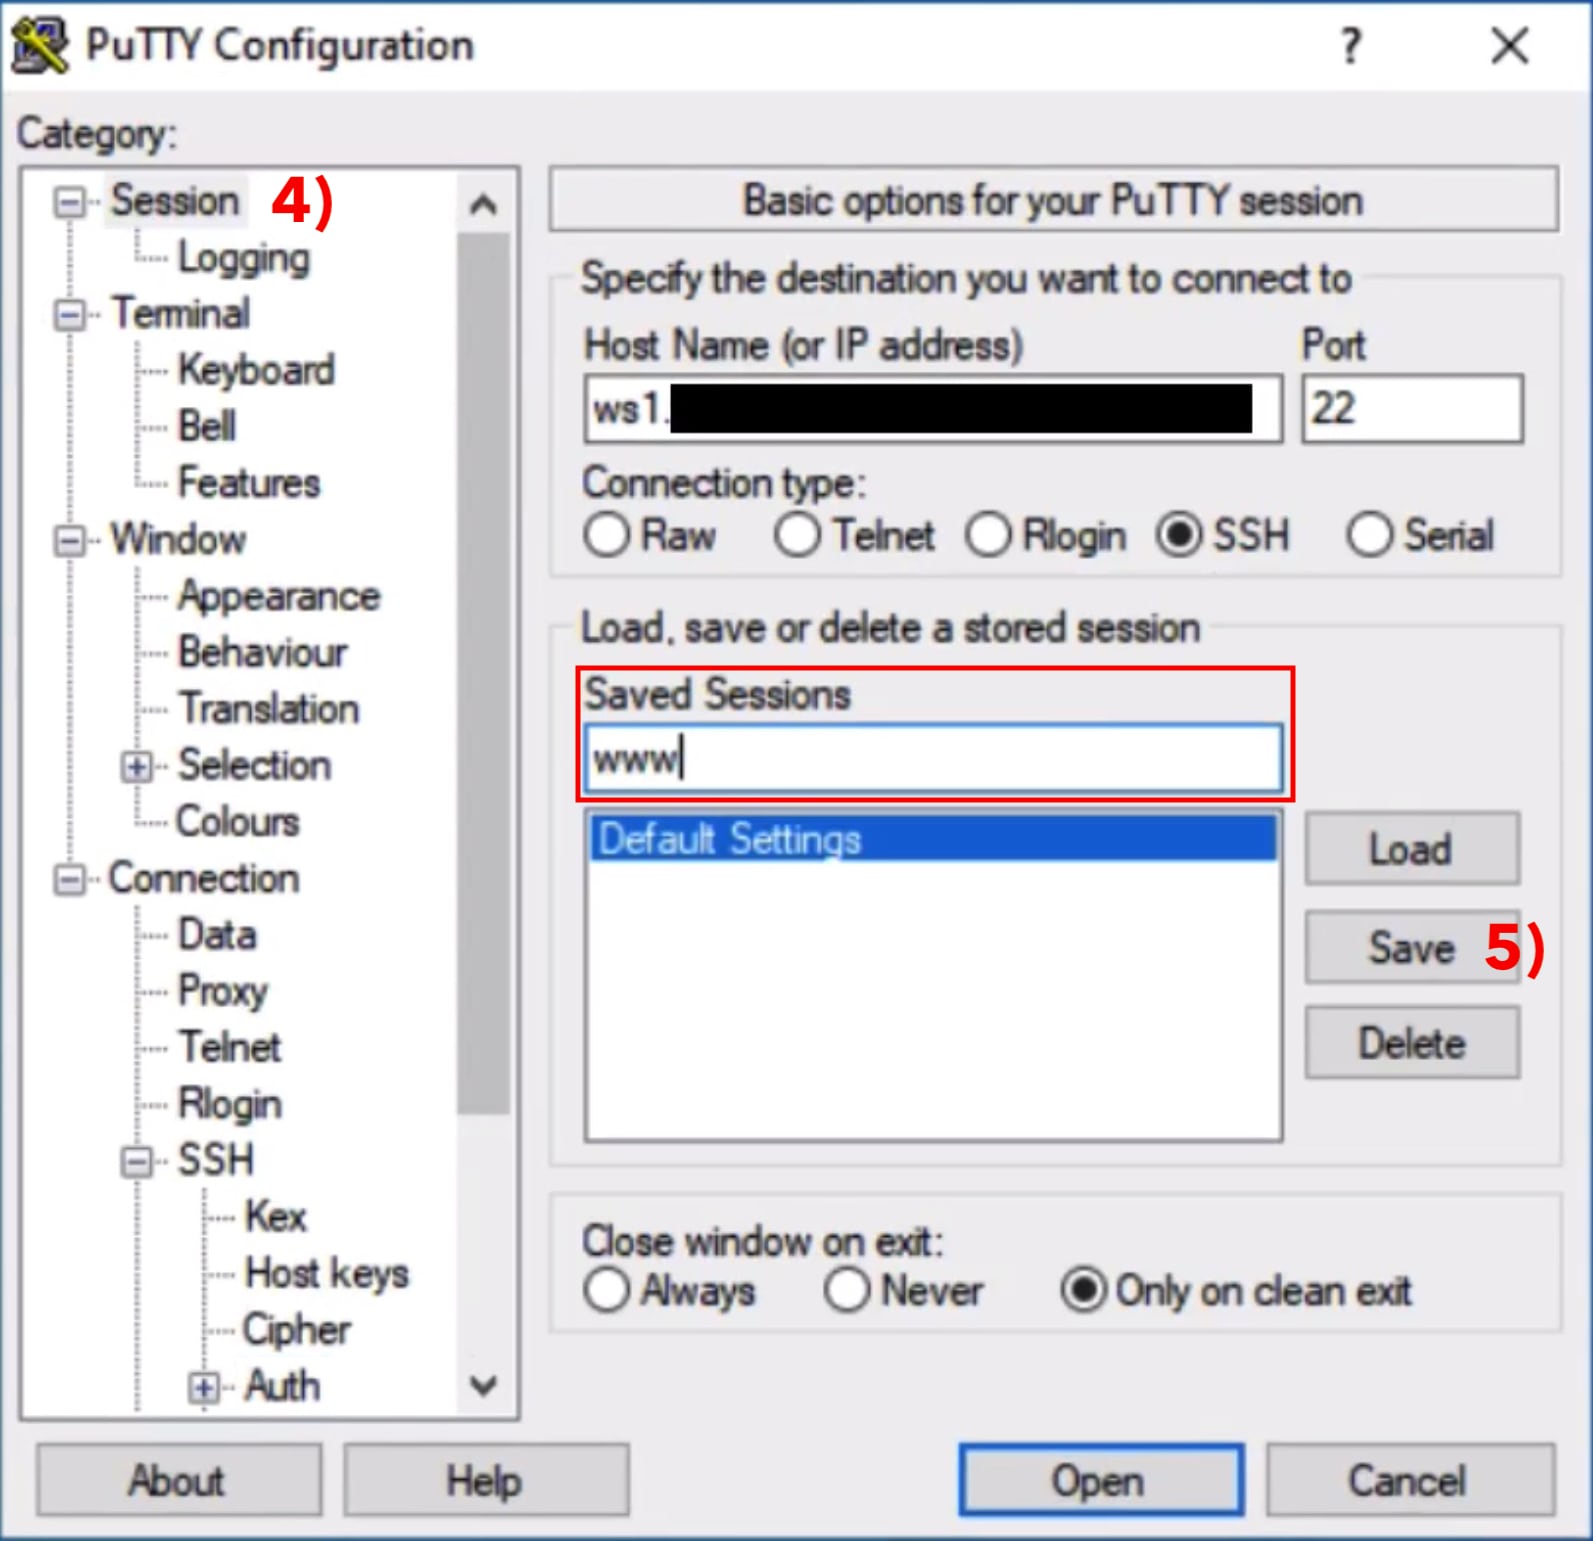
Next, go to Session 4) in the left column again (this is where you started). Enter the the hostname or ip address in the field belonging to Saved Sessions on the right side, marked in red. Then click on Save 5). Now all settings are saved for this server. This way you can start a new session with just one click.
Open a ssh connection
Choose the session you've just saved and click on the Open button with the blue border. Putty is starting the ssh connection using the previously saved settings like servername, username and private key.
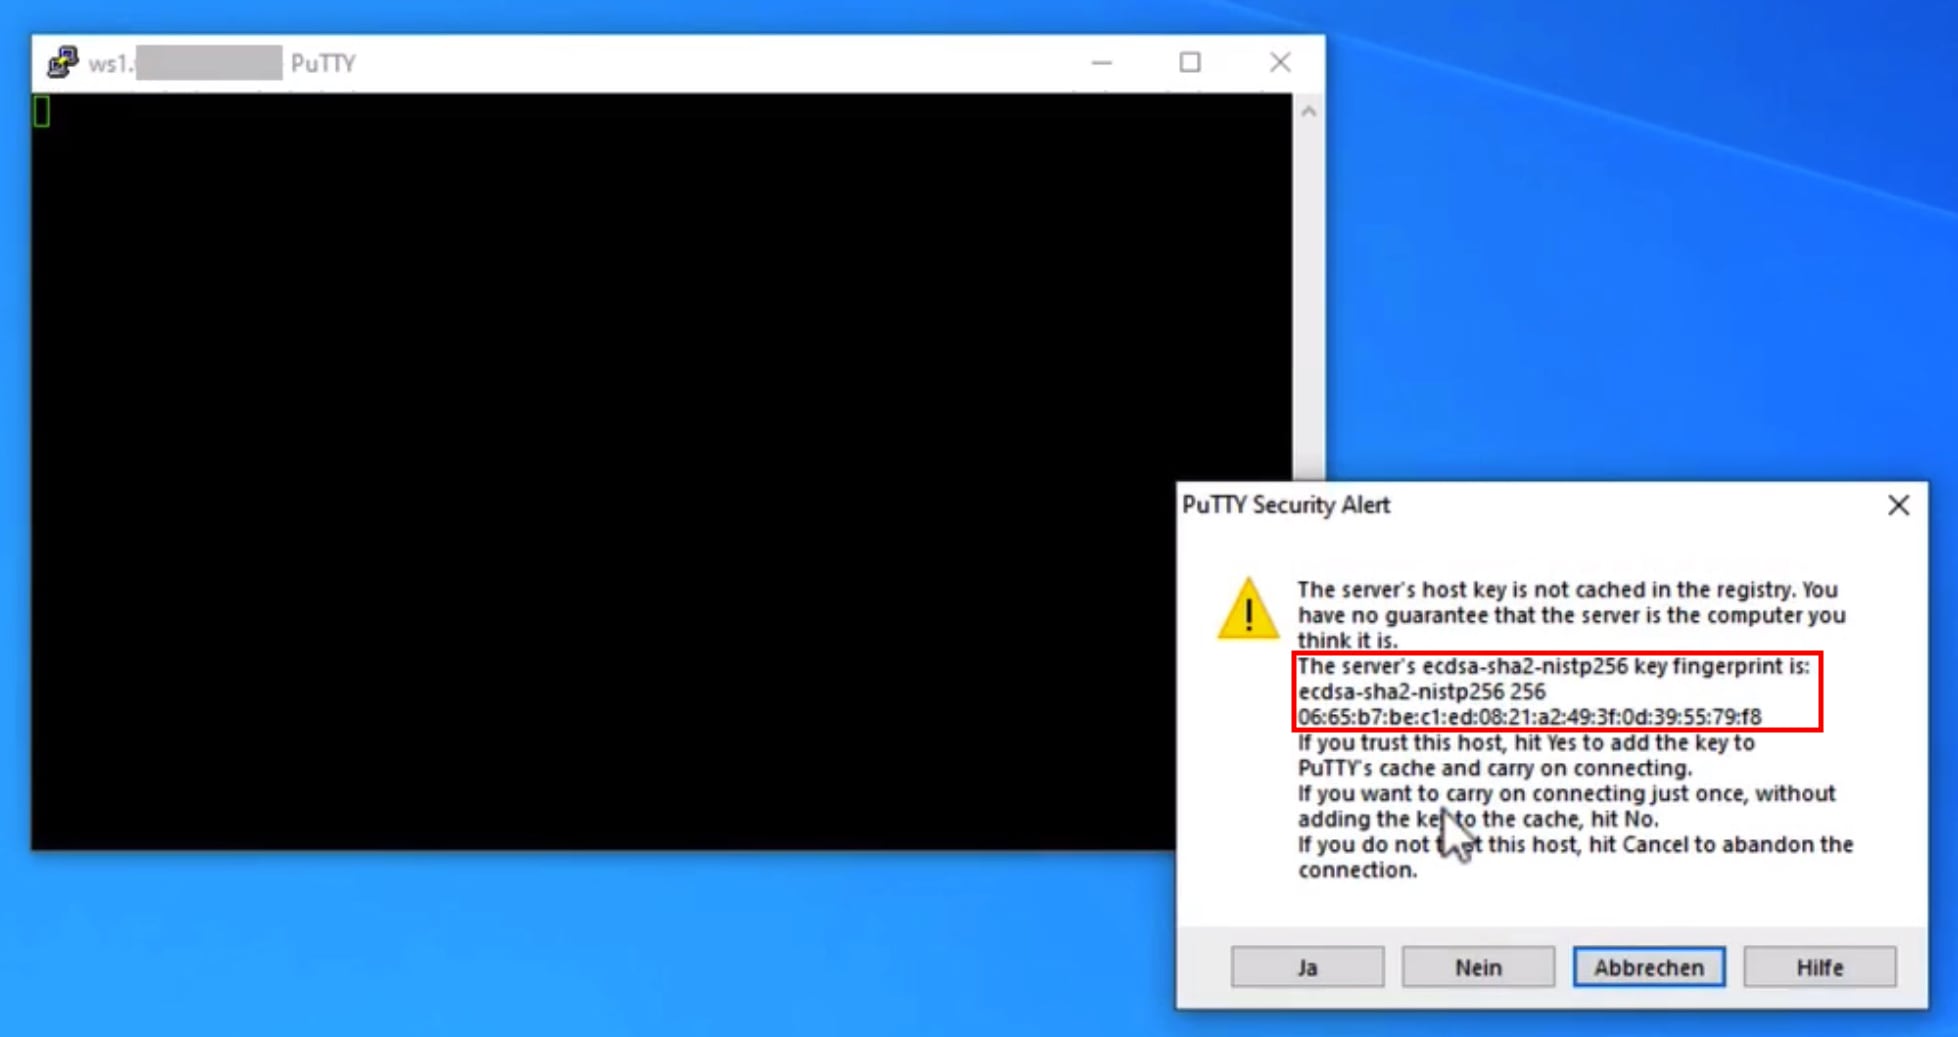
Attention: when a connection is created for the first time, Putty does not know the server yet. This is why a new window will open that shows the fingerprint of the server's public key. This has to be confirmed respectively accepted. This is a security mechanism that will assert you are connecting to the server you inteded to. A fingerprint doesn't change and if it does you should check it. Of course there are legitimate reasons why a fingerprint changes, like when you move your website to another server or when a server is re-installed completely. But there is also the (rare) possibility that your connection is redirected to a foreign server. Consequently, as the fingerprint doesn't usually change, you should ask your provider for the server's fingerprint or if provided you could ask DNS for SSHFP records. With a click on yes the server's fingerprint will be saved for future reference and the connection will be established.
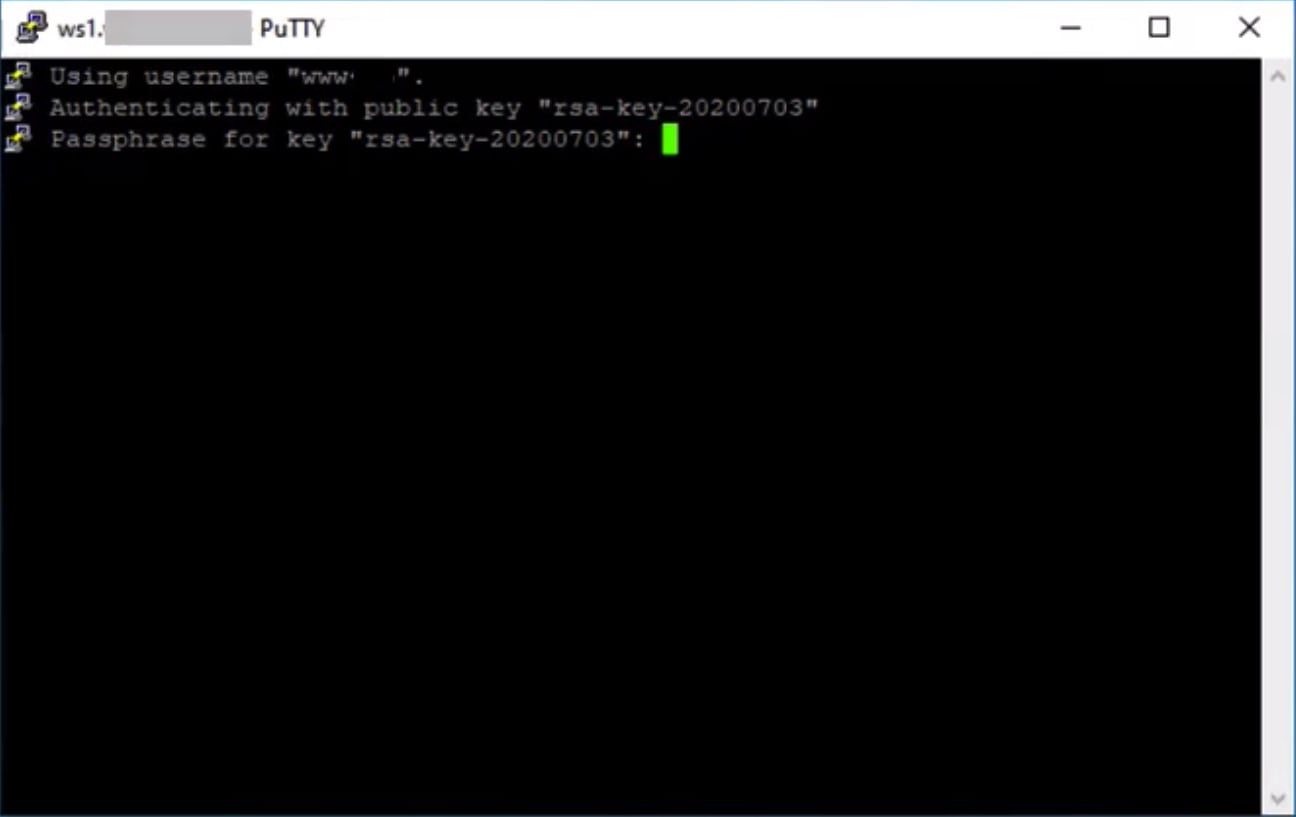
Putty asks for the password to your private key to unlock it. This is the password that you've entered while generating the key. If the password is correct the ssh connection is established and you can start to manage the server.
Automatic logins
You may wonder what happens when you do not set a password for the private key. In this case you don't have to enter anything manually while the connection is established. This could be used for automated scripting, but as the private key is used for several servers it should really be protected with a password. You don't have to remember tens or hundreds of passwords, just the one for your private key. And if that is still to much you could use an ssh-agent. This software keeps your key unlocked after you entered the password once and you will not be asked for the password on any subsequent sessions as long as the agent is not restarted and the key is not removed from the agent.
Software that uses ssh keys
Putty is mostly used to send commands over a secure line but as OpenSSH also implements ftp service as a subcommand, there are several programs that can be used to transfer files with scp or sftp:
- WinSCP / Howto using ssh keys
Transfer files like Windows Explorer using SCP or SFTP protocol1 - FileZilla
Filezilla implements SFTP protocol over ssh SFTP howto with ssh keys
1 SCP (secure copy) is an old protocol used to transfer files via ssh. SFTP is a newer protocol for the same purpose that allows FTP sessions via SSH. FTPS and SFTP get mixed up a lot: SFTP is a protocol for FTP over SSH whereas FTPS is the FTP protocol protected by SSL/TLS like Webservers do with https. This is provided by software like vsftpd or proftpd, not sshd.